Cabinet repainting is an excellent method of changing the appearance of your kitchen or bathroom without the expense of replacing the cabinets altogether. This is a project that can be done with a little time and patience, and the right materials, whether you want to refresh an old color or freshen up your cabinets and give them a new clean appearance. In this guide, we will take you through the process of repainting your cabinets like a professional.
Materials You’ll Need
Before you begin, gather the following materials:
- Paint (choose a durable, high-quality cabinet paint)
- Primer (for wood or previously painted cabinets)
- Sandpaper (medium-grit and fine-grit)
- Painter’s tape
- Drop cloths or plastic sheeting
- Screwdriver
- Clean cloth or tack cloth
- Paintbrush (angled, 2.5” or 3”)
- Foam roller (optional)
- Paint tray
- Cabinet hardware (handles and knobs)
- Paint stirrer
- Caulk (for filling gaps, optional)
- Clean bucket or container (for cleaning hardware)
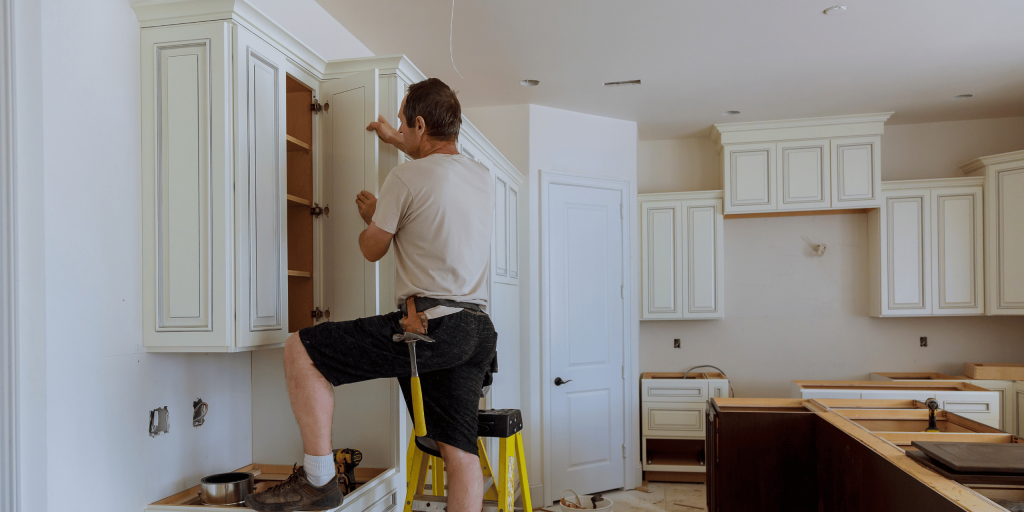
Step 1: Remove Cabinet Doors and Hardware
Take off the Doors
Take the cabinet doors and the drawer fronts off to achieve a smooth and even finish. This provides you with a more convenient access to all the surfaces and prevents unwanted paint splashes on areas you do not want to paint. Mark the doors and the hinges or hardware so you can easily put them back together.
Remove Hardware
Remove the cabinet knobs, pulls, or handles with a screwdriver. Store them somewhere safe so that you can clean them and reuse them in the future, or discard them if you are upgrading to new hardware.
Step 2: Clean the Cabinets
Why Cleaning is Crucial
Grease, dust, and grime may not allow the paint to adhere, and you will end up with a sub-par finish.
How to Clean
Wipe the surfaces of the cabinets with a degreaser or a combination of warm water and dish soap. Focus on the places around handles and cooking areas where there is a possibility of grease accumulation. Dry the surfaces using a clean rag or cloth after cleaning.
Step 3: Sand the Cabinet Surfaces
Why Sanding Matters
Sanding the cabinet surfaces is an important phase in making sure that the paint bonds to the surfaces. It provides a roughish texture that enables the primer and the paint to adhere to each other.
How to Sand
Sand the surface of the cabinets with medium-grit sandpaper (probably 120-grit) lightly. You do not have to sand to the wood, just rough up the finish to give a better surface to the primer. After you have done the sanding, use a tack cloth to clean the cabinets by getting rid of any dust.
If your cabinets are very worn or have a shiny finish, you might have to apply a finer grit sandpaper (approximately 220-grit) to even out the surface.
Step 4: Apply Primer
Why You Need Primer
When repainting cabinets, primer is necessary for previously painted cabinets or wooden cabinets. It makes the paint adhere better and gives a smooth surface to the topcoat of paint.
How to Apply Primer
Apply a thin and even coat of primer to all the surfaces of the cabinets using a paintbrush or roller. For the edges and corners, apply with a brush, and then use a foam roller on the larger flat surfaces. Let the primer dry according to the duration indicated on the manufacturer’s instructions, which is normally 2 to 4 hours.
If your cabinets are a darker shade, then you might require a second coat of primer to cover it fully. Sand lightly between coats of primer using fine-grit sandpaper to have a smoother finish.
Step 5: Paint the Cabinets
Choosing the Right Paint
When it comes to painting cabinets, a high-quality, durable paint that is specifically made to be used on kitchen and bathroom surfaces is best. Seek paints that are scratch-, moisture-, and stain-resistant. Cabinets come out best with a semi-gloss or satin finish, which is easy to clean and provides a pleasant shine.
First Coat of Paint
Once the primer is dry, paint the first coat. Begin with a brush to paint the edges and details of the cabinets, the corners, and trim. On the large flat surfaces, use a foam roller to spread an even coat of paint. Be sure to use thin and smooth coats of paint so that it does not drip and streak.
Dry and Inspect
Let the first coat of paint dry, usually 4 to 6 hours. When dry, check the cabinets to see whether there are any spots, streaks, or areas that have been missed. If it is necessary, rub the surface with fine-grit sandpaper lightly and then apply a second coat.
Step 6: Apply a Second Coat of Paint
Even Coverage
When the initial coat of paint is dry and smooth, paint a second coat. This will assist in enhancing the color and provide a more lasting finish. Apply in the same manner as last time: start with the edges and follow up with a roller on the bigger surfaces. Ensure that the second coat is completely dry before proceeding to the next step.
Step 7: Reinstall Hardware and Doors
When the paint is thoroughly dry, then the cabinet doors and hardware can be reattached. Install the new knobs or pulls at this point, if you are replacing the hardware. Be sure to tighten the screws securely.
Reattach Doors
If you had removed the doors, hang them back again on the frames of the cabinets with care. Put the hinges in line with the holes that have been drilled, and ensure that the doors swing freely.
Step 8: Let the Cabinets Cure
Although the paint might be dry to the touch within a couple of hours, the cabinets should be left to cure over a few days. In this period, you should not use the cabinets or place any item on the cabinets so that the paint can dry and settle.
